dd if=/dev/zero of=largefile count=0 obs=1 seek=200G
[HOWTO] Create a large file that occupies no space
[TIP] Find newest (last modified) files
find . -type f -printf "%TY-%Tm-%Td %TT %p\n" | sort | tail -5
or
find . -type f -printf "%TY-%Tm-%Td %TT %p\n" | sort -r | head -5
[TIP] Avoid SSH security question
ssh -oStrictHostKeyChecking=no -oUserKnownHostsFile=/dev/null user@host
[TIP] Force variable substitution within single quotes in BASH
Sometimes in a BASH script you need to have single quotes but the value inside them is actually a variable. Here is how to have both the single quotes and the actual value of the variable expanded.
% foo=bar
% echo $foo
bar
% echo "$foo"
bar
% echo '$foo'
$foo
% echo "'$foo'"
'bar'
It seems that double quotes around single quotes make the single quotes expand variables.
[TIP] Count non-empty lines in a text file
grep -c -v '^$' filename
If you want to, as well, exclude lines which contain only spaces:
grep -c -v '^ *$' filename
Notes (from the grep man page):
-c, --count
Suppress normal output; instead print a count of matching lines for each input file. With the -v, --invert-match option (see below), count non-matching lines. (-c is specified by POSIX.)
-v, --invert-match
Invert the sense of matching, to select non-matching lines. (-v is specified by POSIX.)
Anchoring
The caret ^ and the dollar sign $ are meta-characters that respectively match the empty string at the beginning and end of a line.
[HOWTO] Install and Configure FreeBSD 7.1 on VMware Workstation 6.5 From the Ground Up
This HOWTO shows a step-by-step installation and configuration of FreeBSD 7.1 from scratch. The reader should have a basic Linux and/or Unix knowledge and should feel comfortably with the console. Throughout this document, by “VMware” I’m actually referring to “VMware Workstation”.
Note: This is a work in progress, I add content and, from time to time, go back and change some text to make it better. Please, check up regularly for the latest updates.
1. Getting the install media.
I happen to have a DVD labeled “FreeBSD 7.1 32bit DVD” which I got for free at FOSDEM ’09 but you can as well go to ftp://ftp.freebsd.org/pub/FreeBSD/releases/i386/ISO-IMAGES/7.1/ and download the 7.1-RELEASE-i386-bootonly.iso ISO image – it’s just 36.1MB and is really all you need for this installation approach. You don’t need to burn it on CD or mount it whatsoever.
2. Creating the virtual machine.
For this HOWTO I’ve been using VMware Workstation version 6.5.1 build-126130 on Kubuntu 8.10 host, with KDE 4.1.4, but most probably different versions would work, too.
I had some keyboard problems within the virtual machine itself. A quick search showed that this can easily be fixed by adding
xkeymap.nokeycodeMap = truein~/.vmware/config. I don’t know if this problem is caused by this specific Kubuntu version and/or KDE 4.x, but at work I’m running Fedora 8 with KDE 3.5.8 as host (and the same VMware version) and don’t have it there.
The “New Virtual Machine Wizard” goes like this:
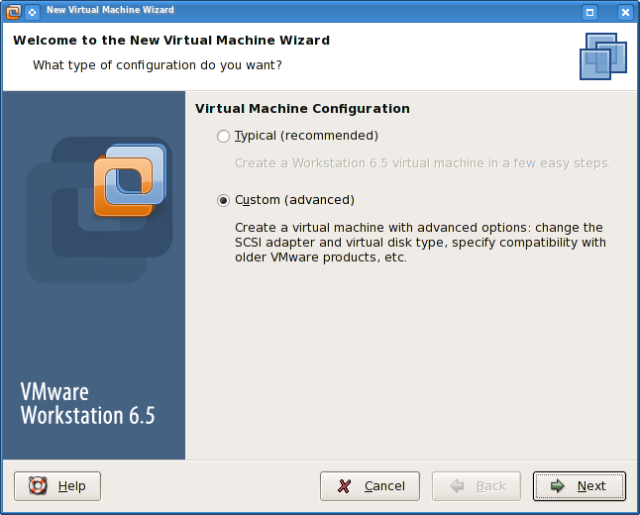
2.1. I choose “Custom” here.
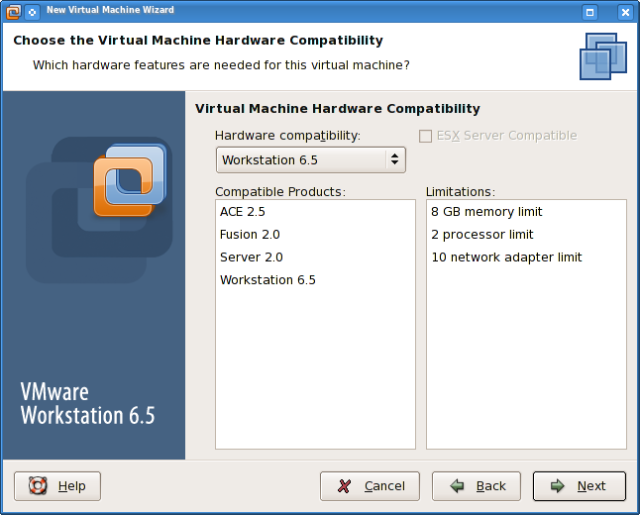
2.2. Accept the defaults here.
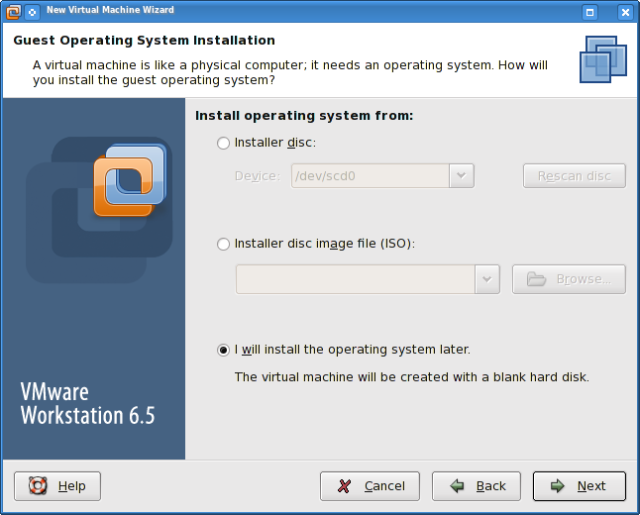
2.3. I Select “I will install the operating system later.”, because I want to change something in the VMware BIOS, prior to starting the installation, and avoid accidentally booting from the installation media.
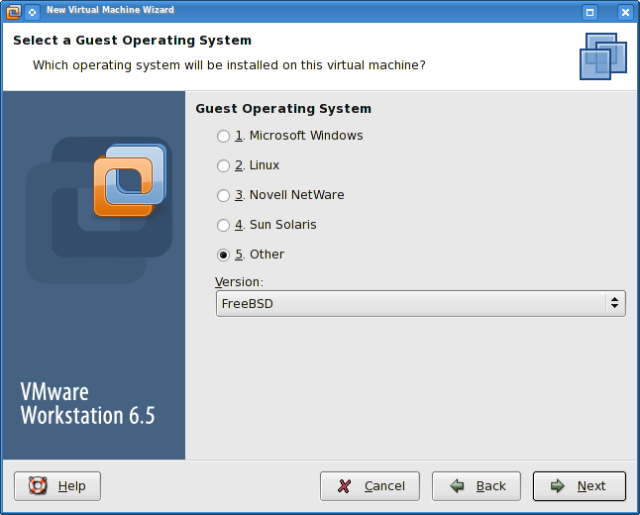
2.4. Select Guest Operating System: 5. Other, Version: FreeBSD
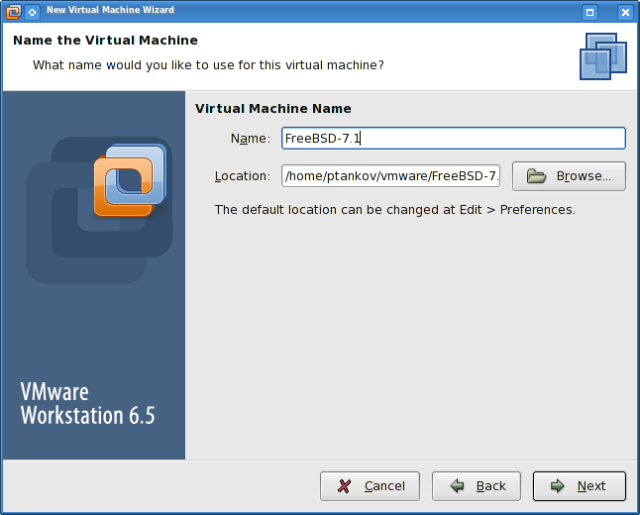
2.5. Let’s name it “FreeBSD-7.1”.
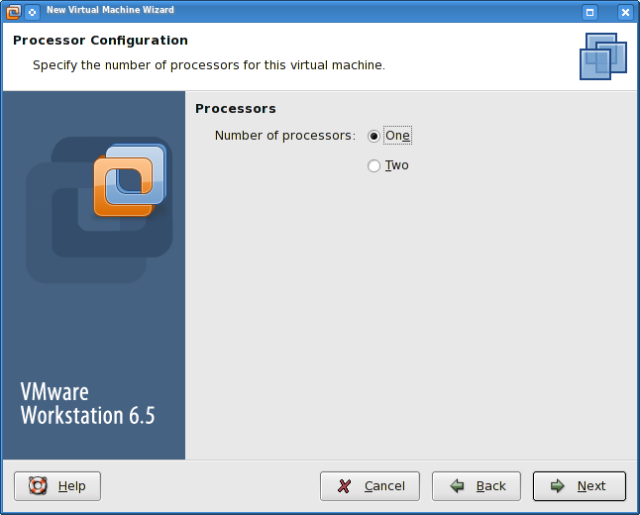
2.6. Defaults here.
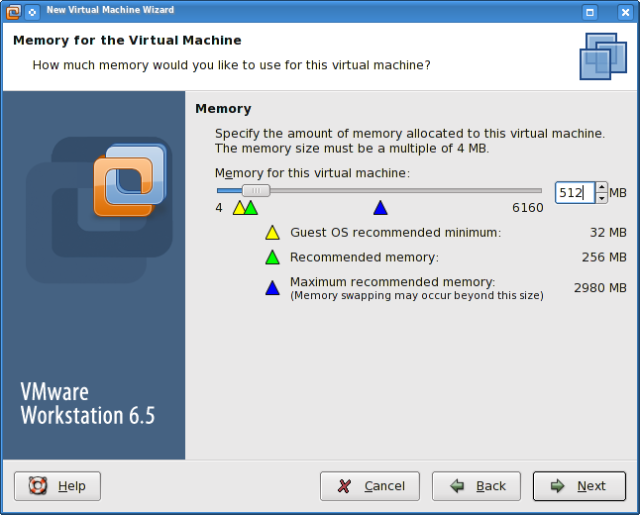
2.7. My host machine has quite enough RAM (4G), so I’m selecting 512 MB RAM for the guest.
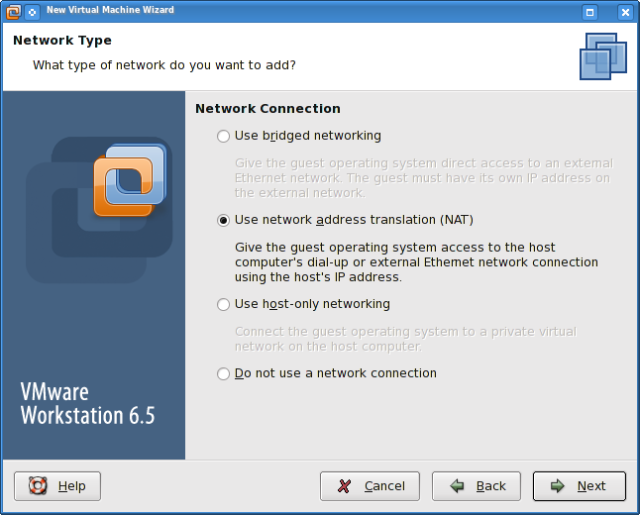
2.8. NAT is OK for me, because I don’t want my guest to appear between the rest of the machines in the office and, besides, I’d like all the details of network configuration taken care of automatically. Also, moving the virtual machine image between different hosts is easier this way.
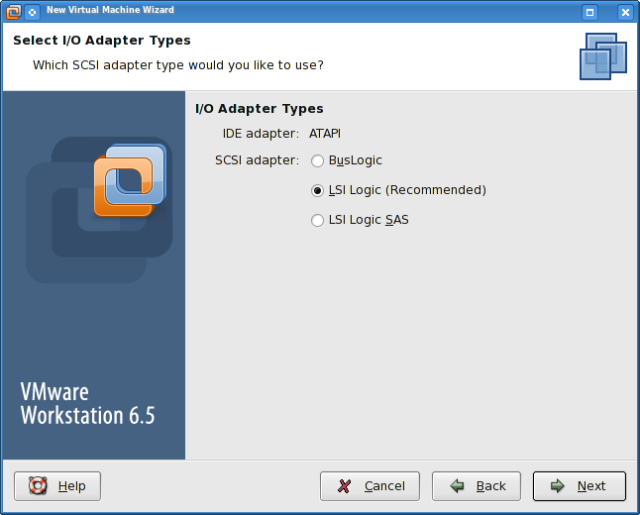
2.9. I don’t understand the question, therefore defaults here.
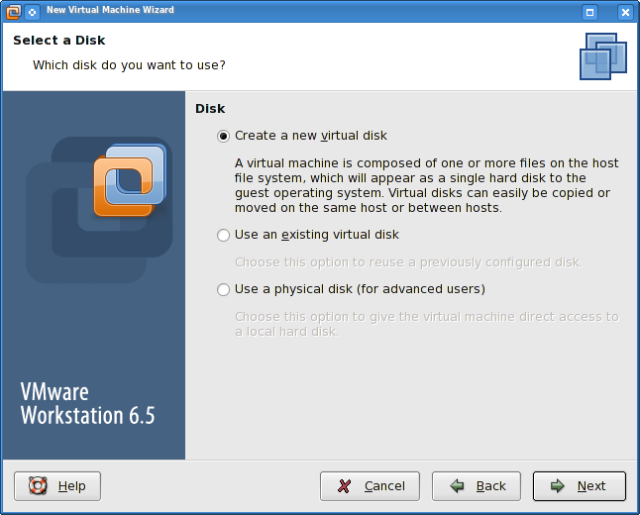
2.10. I want a new disk to be created for me, so I go with the defaults again.
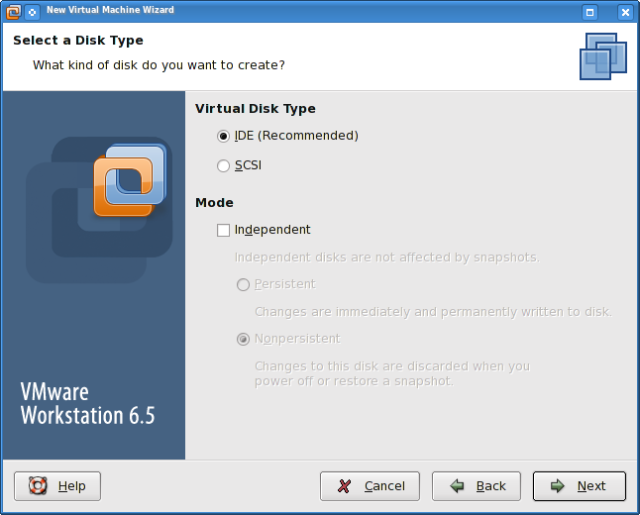
2.11. I don’t know which setting is better for FreeBSD, so here I, too, accept the proposed defaults.
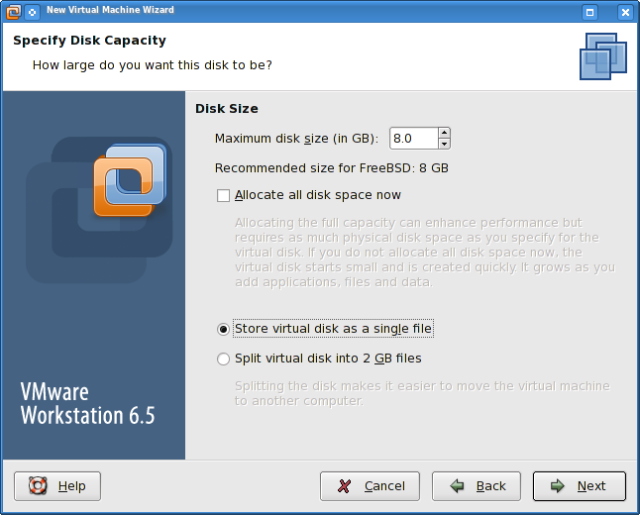
2.12. 8G is just enough for what I’m going to do (I didn’t know this in advance, but it fortunately happened so). Most modern OSes and/or filesystems can accommodate a file that large, so I don’t see why should I want it chunked. I have a relatively small hard disk on my laptop and by the time I took this screenshot I thought I’d save some space by having the virtual disk grow as needed. It eventually appeared that, of those 8G, up to about 7G were used at some point (when building kde4), so maybe having the virtual disk allocated in advance is not that bad idea, after all. Besides, there will be heavy compilation ahead, so this could speed things up a bit.
There’s a small bug here. Take a look at step 2.5. If this is the first virtual machine you’ve ever created with your Linux user, you most probably don’t have the
~/vmwarefolder created. If this is the case or if you, at step 2.5., chose another nonexistent parent folder for this VM, then the option “Store virtual disk as a single file” will be grayed out and you can’t select it. Cancel the wizard, create the folder and start over.
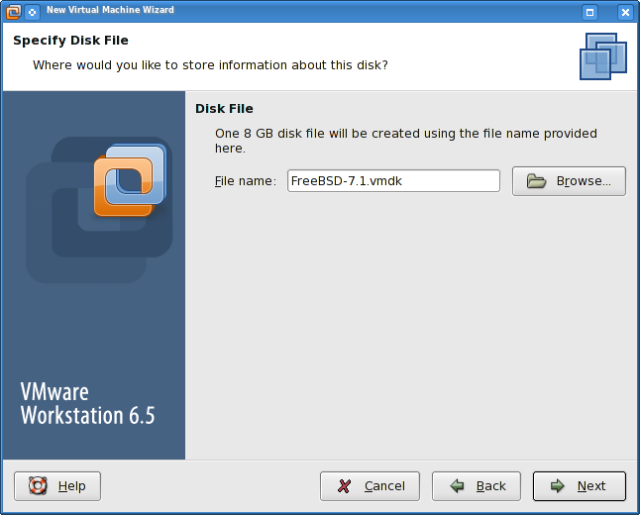
2.13. Defaults here.
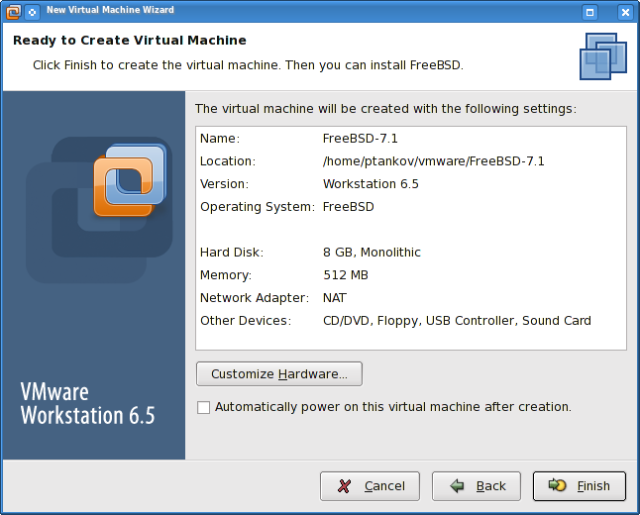
2.14. I don’t want my VM automatically powered on after creation. I also, hit “Customize Hardware…” button and remove the floppy – who needs it these days, anyway. Then “Finish” and so long for the creation of the virtual machine.
3. Installing FreeBSD 7.1 in the virtual machine.
I’m going to show detailed steps of how I install FreeBSD on VMware. I don’t claim that this is the best way, it’s just my way. My approach is minimalistic. It boils down to sticking to the bare minimum during the installation phase and doing any configuration later. You’ll see that I don’t even enable Linux binary compatibility or ports during installation. There will be screenshots accompanying most steps in this HOWTO, except for some trivial ones, to avoid bloating. I’ll also quote the FreeBSD Handbook often.
First of all, I want to set the BIOS clock in the new VM to GMT so I power it on and hit F2 to enter SETUP.
This is the time when you’ll understand if you need the keyboard fix mentioned in the beginning. If you can’t navigate in the BIOS naturally, and the keys you press cause odd behavior then you probably need the fix. If you can’t navigate in the BIOS, you won’t be able to navigate in the FreeBSD installation, either.
Although my host machine’s BIOS clock is set to GMT, the host OS (my Kubuntu) is configured with my local timezone, of course. The new virtual machine’s BIOS clock is showing the local time by default, because it probably takes it from my Kubuntu, not my BIOS. Anyway, I set it 2 hours back and there it is in GMT.
That’s why at step 2.3. I chose “I will install the operating system later.” If I had specified the ISO file then, and now miss the moment of hitting F2 (which is very easy to miss), the installation would start before fixing the BIOS time.
Now I can power off and go to VM –> Settings –> CD/DVD (IDE) –> Connection and select the ISO image 7.1-RELEASE-i386-bootonly.iso I downloaded. “Save”, power on again and off we go…
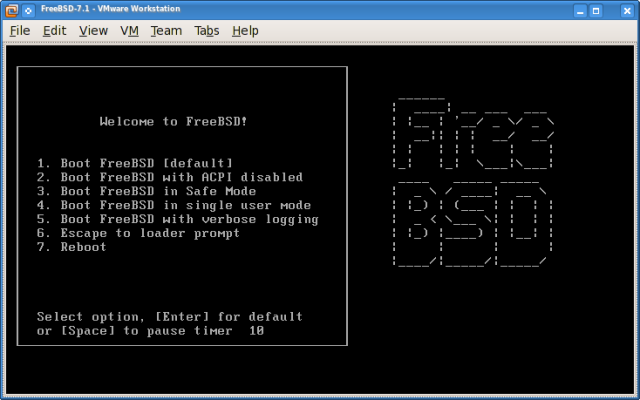
3.1. I put this screenshot for the sole purpose of making this HOWTO unnecessary long.
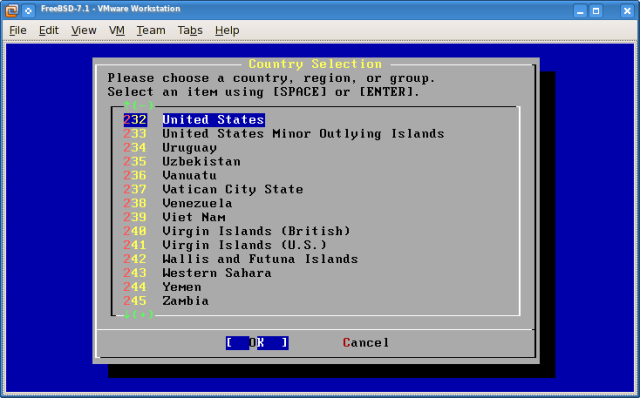
3.2. I choose “United States” so that I’m not asked to choose an alternative keyboard layout. Although not my country, US keyboard layout suits me best, isn’t this the case with everybody? By the way, I still don’t quite understand what exactly this questions asks me – whether it means “Set your location now, but the default keyboard layout for the system will still be US”, or “You may be having a non-qwerty keyboard (French, German, Chinese) so we want to set the default keyboard layout for you so that you can type at all”. Anyway, throughout my very little experience with the FreeBSD installer, I’ve always chosen US at this screen (with the sincere confidence that my location can easily be changed post installation, if necessary, and I still be on the safe side) and have never had worries with that. I mean, never had to change this later.
The FreeBSD Handbook doesn’t explain this any further. Here’s the quote: “Use the arrow key to choose a country, region, or group. Then press Enter, it will set your country and keymap easily.”
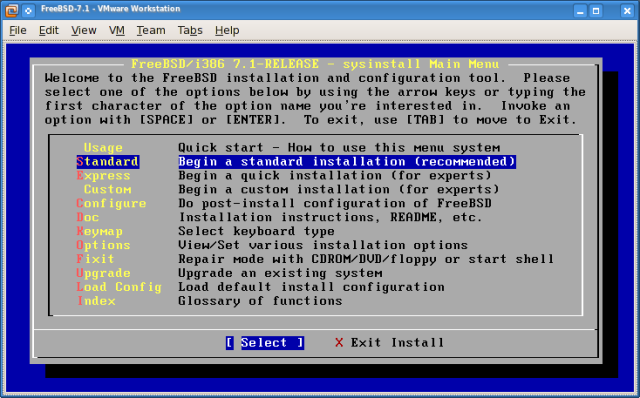
3.3. Standard installation sounds least scary.
3.4. A dialog box tells me I’ll need to deal with an “fdisk”-like partitioning program to create BSD slices.
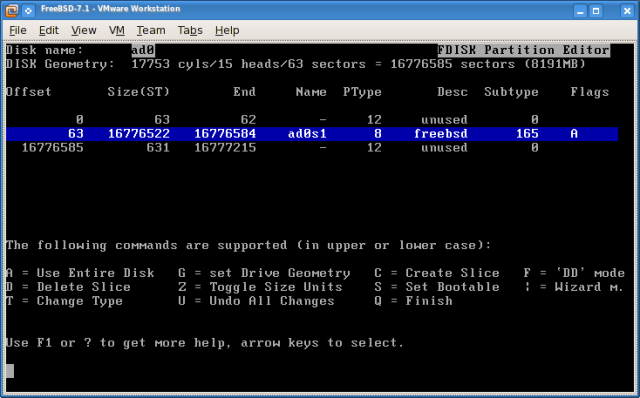
3.5. I hit A = Use Entire Disk and these 3 slices are created automatically for me. Here’s what the FreeBSD Handbook says about this: “The existing slices will be removed, and replaced with a small area flagged as unused (again, an artifact of PC disk layout), and then one large slice for FreeBSD. If you do this, then you should select the newly created FreeBSD slice using the arrow keys, and press S to mark the slice as being bootable… When finished, press Q. Your changes will be saved in sysinstall, but will not yet be written to disk.” That’s what I did.
I must confess, I always felt tempted to use the F = ‘DD’ mode and, in fact, I did try it separately in another VM and all went well. For the purposes of this HOWTO I’m using A = Use Entire Disk. More on this here: Formatting Media For Use With FreeBSD and here: Will a “dangerously dedicated” disk endanger my health?.
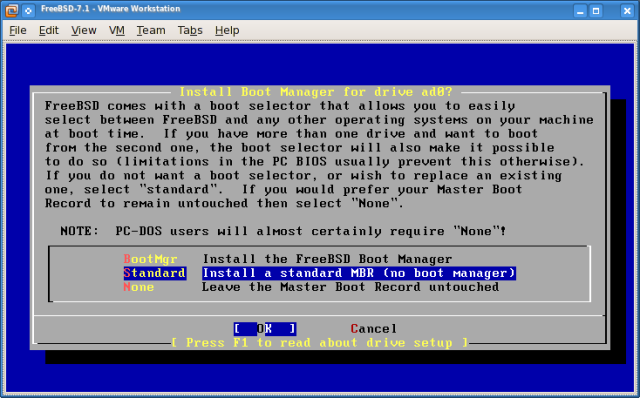
3.6. Since this is the only OS in the VM, I can safely choose “Standard Install a standard MBR (no boot manager)”.
3.7. Another dialog box telling me I’ll need to create the partitions inside the BSD slices.
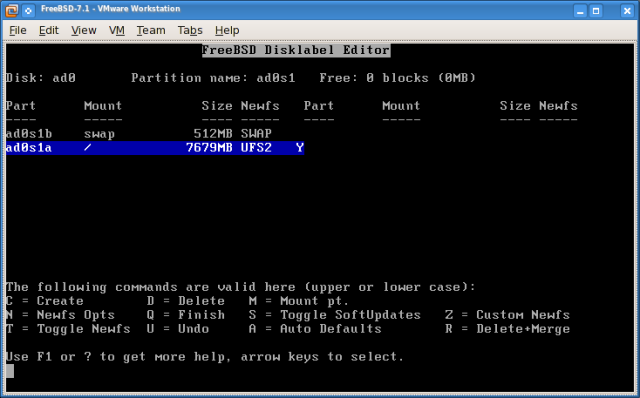
3.8. Nothing special here – a 512M swap partition and all the rest goes for the root filesystem (“/”). I’m not planning separate /home, /usr or so. After all, this is just a playground and I want to keep it simple. It is arguable whether a swap partition is needed at all under VMware, but I want to resemble a real world situation. The size of the swap partition is arguable, too, but 512M worked for this scenario.
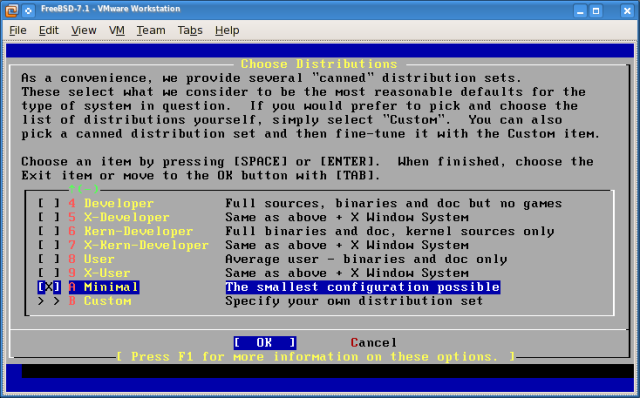
3.9. As promised, I go for “A Minimal The smallest configuration possible”. I recall the installers of RHEL3 and Fedora Core 4 had a “minimal” option, which I now miss, because recent versions abandoned this approach. Other popular distros don’t seem to have it, either.
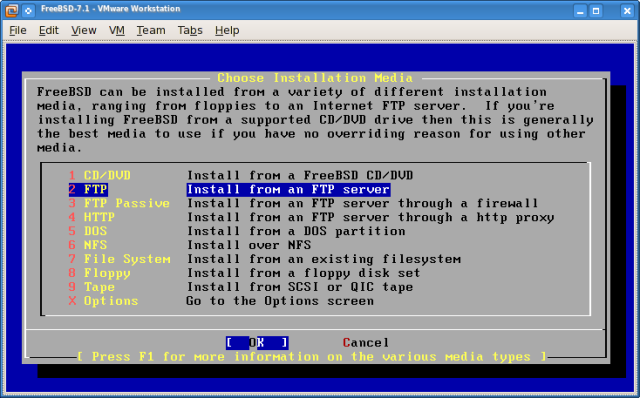
3.10. The 7.1-RELEASE-i386-bootonly.iso ISO image I downloaded doesn’t carry the distro files, so I’ll use network install. I could have downloaded 7.1-RELEASE-i386-disc1.iso or 7.1-RELEASE-i386-dvd1.iso.gz just as easily, and chosen “1 CD/DVD Install from a FreeBSD CD/DVD” option, but where’s all the fun in that? Anyway, FTP sounds “old-school” enough, so if there was only one network method to work for FreeBSD, that must be FTP. If your are behind a web proxy, that will probably fail. I’ve been behind proxy in the past and have been beating the air to get the “4 HTTP Install from an FTP server through a HTTP proxy” option working with no success.
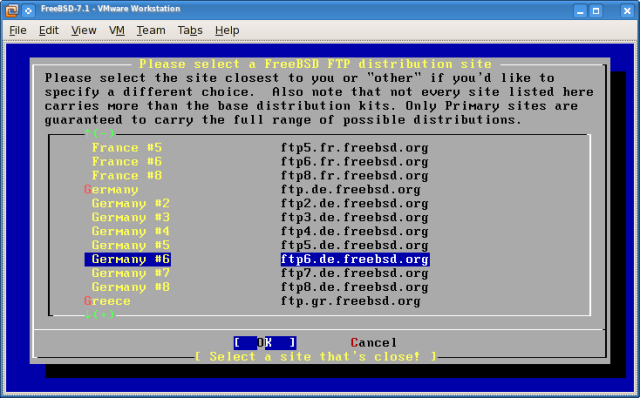
3.11. Germany sounds like a good choice. It’s a shame http://bg.freebsd.org/ is down. :(
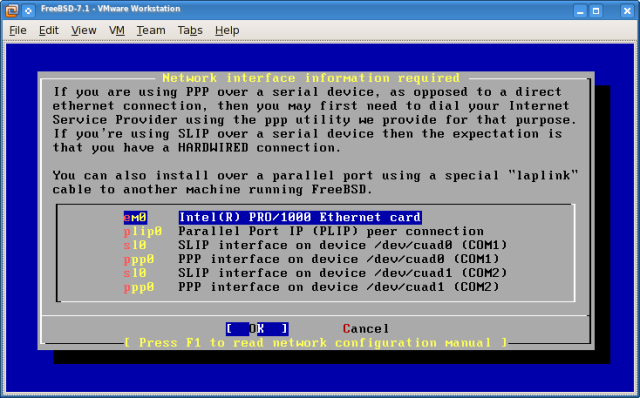
3.12. em0 must be my Ethernet card.
3.13. I don’t want IPv6. Again, this is a playground so let’s keep it simple.
3.14. I do want DHCP, because earlier I created my VM with NAT. VMware has its own DHCP server that takes care of network configuration.
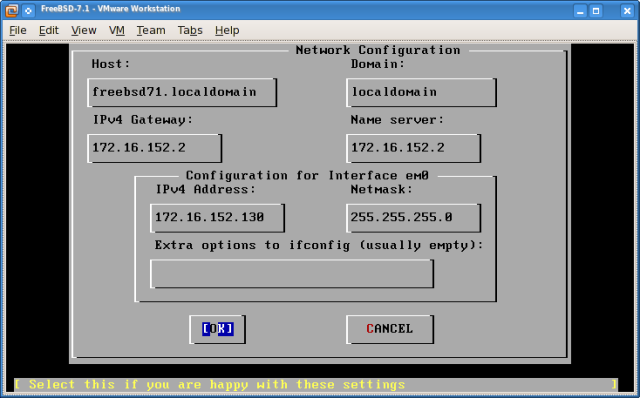
3.15. Hostname will have to be entered manually. By the way, I didn’t try leaving that field blank. Maybe I’ll try and see what happens.
3.16. A warning dialog box asking if I’m sure. Select “YES” here.
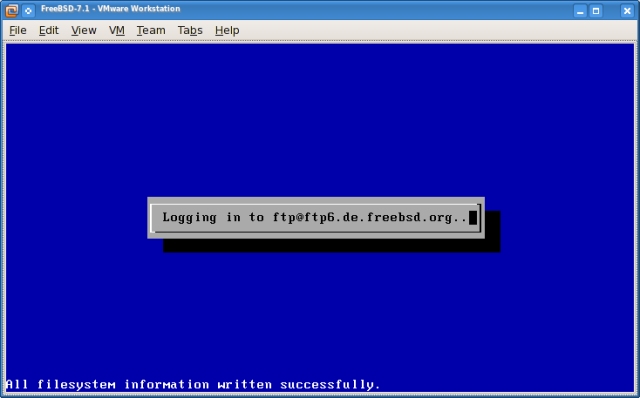
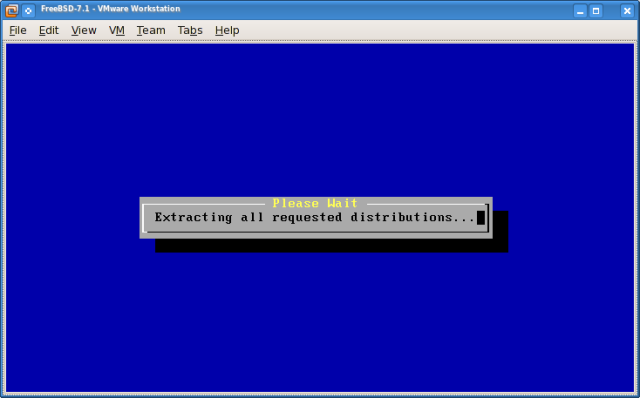
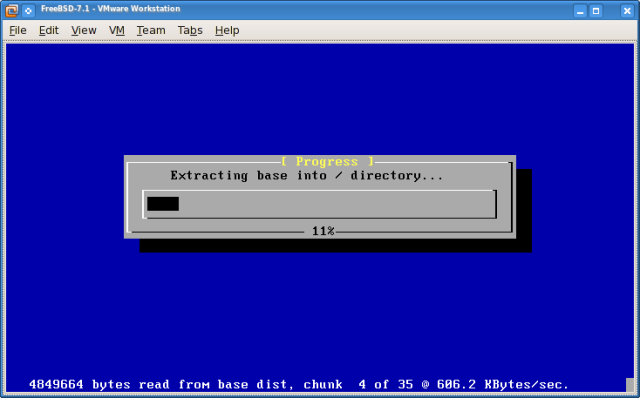
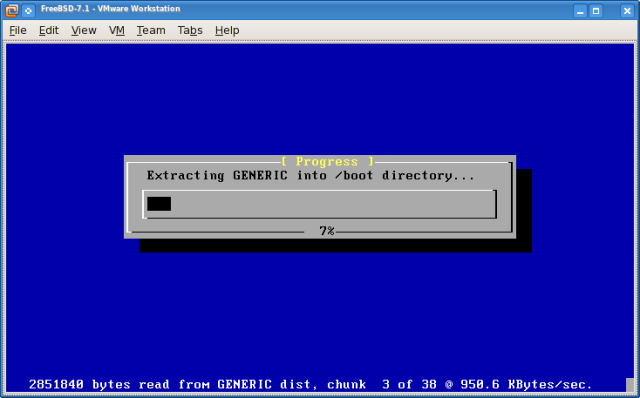
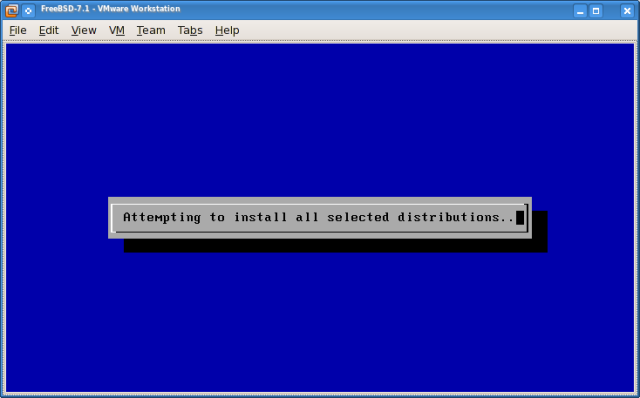
3.17. Some progress screenshots.
3.18. A congratulating dialog box show here with “OK” as only button.
3.19. I don’t want this machine to function as a network gateway.
3.20. I don’t want to configure inetd and stuff, because it’s obsolete.
3.21. Yes, I do want SSH login.
3.22. Anonymous FTP access is not needed.
3.23. No NFS server or client needed. Well, if I ever need NFS client I’ll configure it later. I wouldn’t want to take all the fun out of it by letting some program do it for me :)
3.24. I don’t want to customize system console settings.
3.25. I do want to set the timezone.
3.26. A dialog box asks me if this machine’s CMOS clock is set to UTC and I answer “Yes”, because the first thing I did after creating the VM was to set it’s BIOS time to GMT.
3.27. A couple of dialogs to select the timezone.
3.28. I don’t want Linux binary compatibility right now. Will enable it later.
3.29. I answer that I don’t have a PS/2, serial or bus mouse. In fact, even though my host mouse is connected with USB, VMware is known to always emulate mouse as PS2. Nevertheless, answering “No” here, surprisingly, doesn’t cause any problems and mouse just works – I don’t know why.
3.30. The installer offers I quote “… a collection of thousands of ready-to-run applications, from text editors to games, to WEB servers and more.” and asks if I want to browse it now. No, I don’t.
3.31. I don’t want to add user accounts now. Part of this playground is to get familiar with FreeBSD and I want to learn how to add users from the console later and don’t want the installer to take the fun out of it.
3.32. Now I set the root password.
3.33. I don’t want to visit the general configuration menu for a chance to set any last options for the same reasons as in 3.10, 3.23, 3.31. Besides, the configuration menu is user-hostile and scares me – I’d rather take my chances on THE CONSOLE. :)
3.34. The configuration menu appears anyway. Huh, why did it ask me then? Select “X Exit Install”.
3.35. A dialog box asks if I’m sure. Yes, I am. But before hitting the “Yes” button I must open the VM settings and unselect the ISO image option for the CD ROM and let it use a physical drive. VMware may complain, see the screenshot below:
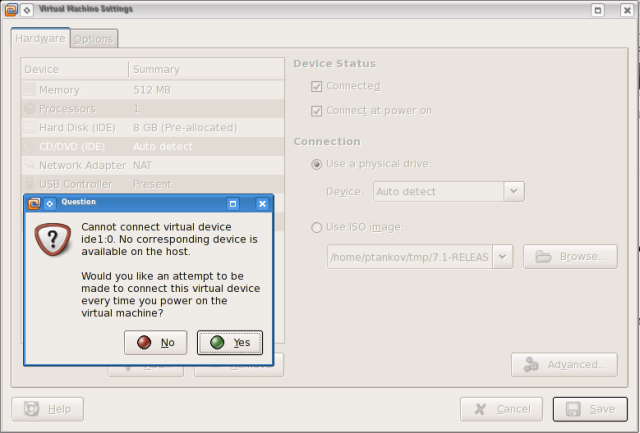
3.36. I don’t know what the problem is, but I hit “Yes”.
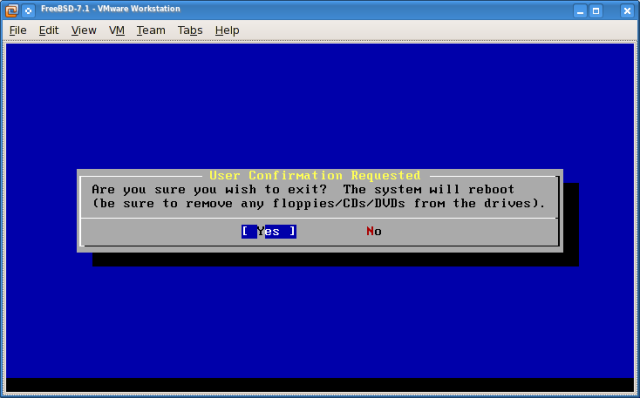
3.37. Now I can safely tell the installer to reboot.
3.38. The VM reboots and loads my new FreeBSD-7.1 system! There is a small glitch, though. The message “Starting sshd.” stays there for several minutes. It looks like the system’s hung, but be patient it will boot eventually. A short investigation revealed that sendmail is the one to blame and looks like the boot process waits for it to timeout or whatever. I don’t even know if it eventually starts, but I don’t care. I disable it by adding sendmail_enable="NONE" in /etc/rc.conf, reboot again and all goes smoothly this time. Voila, we have ourselves a brand new FreeBSD to play with! :)
The first thing I do with the freshly installed system is open
/boot/loader.confand put the linekern.hz=100there. See http://ivoras.sharanet.org/freebsd/vmware.html, section “3. Reduce kern.hz” for more info.
4. Updating the Base System sources, a.k.a. “The World”.
Updating is crucial for an operating system because as soon as it’s installed it’s already old. FreeBSD has a clear distinction between base system and software packages (ports), and they are updated differently. In contrast, most Linux distros wrap everything in packages and updating is uniform.
There is a way to do a binary update of the base system, much like in Linux. This process is called FreeBSD Update and is explained in the Handbook. I’m going to go for the source update approach, because it’s… that’s right – it’s more fun. Of course, updating from source is also well documented, but I’ll briefly list my steps here. Again, like in the previous chapter, I’m going to show the way I updated my FreeBSD but I don’t claim this to be the best or only possible way.
I’d like to login to the new FreeBSD installation over SSH so that I use my host console and not switch between VMware and host all the time. By default, root login is not allowed.
4.1. Open /etc/ssh/sshd_config and change #PermitRootLogin no to PermitRootLogin yes (make sure to uncomment, as well). Then issue /etc/rc.d/sshd restart and now I can initiate an SSH session to FreeBSD from my Linux host.
To update the base system sources there are several tools: Anonymous CVS, CTM, CVSup and probably more. However, in FreeBSD 6.2 and onwards there is a new tool – csup(1), which is a rewrite of the CVSup software in C and I’m going to use that, because it’s included in the minimal installation I just did and don’t have to install it from port.
To run csup I need a configuration file. In /usr/share/examples/cvsup/ there are several templates. Now is a good time to mention that there are several branches I could follow when updating from source and they are confusing to me, as well. To put it simply, I can choose to receive more updates with a higher risk of breaking things (and use template stable-supfile), or receive only critical security patches but be more stable (and use template standard-supfile). The complete list of the CVS tags is in the Handbook.
4.2. I’m choosing the safe side and will edit the standard-supfile template. Besides, there isn’t so much benefit of tracking the latest updates with the base system. Maybe the ports are more worth being followed in this manner. I need to change *default host=CHANGE_THIS.FreeBSD.org to *default host=cvsup7.de.FreeBSD.org, for example.
4.3. Let me deal with the refuse file, because I don’t need to download the language-specific files. mkdir /var/db/sup and cp /usr/share/examples/cvsup/refuse /var/db/sup/.
4.4. Now it’s time to do the actual retrieval of the sources. Usually, a simple csup /usr/share/examples/cvsup/standard-supfile should be enough for most people and for myself if I was doing this from my home laptop. Unfortunately, now I’m at work and our Internet access is a bit limited. The default CVS port is 5999 and our corporate firewall blocks it, so I’ll need a workaround. I’ll do the SSH tunneling like this: ssh -f myusername@my.home.machine -L 5999:cvsup7.de.FreeBSD.org:5999 -N. -f requests ssh to go to background just before command execution and -N means “do not execute a remote command” (this is useful for just forwarding ports). Now the command I need is csup -h localhost /usr/share/examples/cvsup/standard-supfile and about 45 min. later it’s done. The sources are retrieved and put in /usr/src.
The base system sources include the kernel sources, that’s why I don’t write a separate section about updating the kernel sources.
5. Rebuilding “world” & compiling a new kernel. Installing the new kernel & the new world.
Once having the sources, the FreeBSD Handbook advises that the currently recommended sequence of actions when upgrading is: buildworld, buildkernel, installkernel, installworld.
5.1. Firstly, check /usr/src/UPDATING for any pre-buildworld steps necessary for your version of the sources.
5.2. Create the file /etc/make.conf and put the following lines in it:
CPUTYPE?=core

CFLAGS= -O2 -fno-strict-aliasing -pipe

NO_PROFILE=true
Note: My laptop has Intel Core Solo CPU, that’s why I use
CPUTYPE?=core. You put whatever is appropriate for you. The complete list of valid CPU types is in/usr/share/examples/etc/make.conf. The other options should be suitable for most users.
5.3. As the FreeBSD Handbook suggests, in order to speed up building, I reboot the system and at the boot prompt select the “single user” option. It will boot and ask “Enter full pathname of shell or RETURN for /bin/sh:” and I press ENTER here. Then the Handbook instructs me to run the following sequence of commands:
fsck -p

mount -u /

mount -a -t ufs

swapon -a
This checks the file systems, remounts the root filesystem (“/”) read-write, mounts all the other UFS file systems referenced in /etc/fstab and then turns swapping on. Having in mind that the system is freshly installed on VMware, I don’t think fsck -p is really needed.
Then the instruction follows:
Note: If your CMOS clock is set to local time and not to GMT (this is true if the output of the date(1) command does not show the correct time and zone), you may also need to run the following command:
#adjkerntz -iThis will make sure that your local time-zone settings get set up correctly — without this, you may later run into some problems.
This won’t be necessary because the very first thing I did after powering on my newly created virtual machine was to ensure it’s BIOS time was set to GMT. See the beginning of section “3. Installing FreeBSD 7.1 in the virtual machine.”
5.4. cd /usr/src and make -j4 buildworld to start building. The -j4 option has make(1) run up to 4 processes in parallel. The FreeBSD Handbook says that this usually helps regardless of whether you have a single or a multi processor machine and empirical evidence posted to the mailing lists shows this number generally gives the best performance benefit on a single CPU. About 4 hours later (on my machine) the world is rebuilt. The resulting binaries are in /usr/obj.
5.5. While still in single user mode (for speed reasons), in order to compile a new kernel I do this: cd /usr/src/sys/i386/conf and cp GENERIC MYKERNEL. Edit MYKERNEL to leave only cpu I686_CPU, comment out makeoptions DEBUG=-g and options INET6 and change ident GENERIC to ident MYKERNEL.
5.6. cd /usr/src and make buildkernel KERNCONF=MYKERNEL to start building. I don’t know whether it’s safe to use the -j option here. About 35 min. later (on my machine) my kernel is built.
5.7. To install the new kernel I do: make installkernel KERNCONF=MYKERNEL. Don’t use -j option here.
5.8. I then reboot again into single user mode as explained in 5.3, this time in order to actually load the new kernel.
5.9. I run mergemaster -p, the working directory doesn’t matter. It should complete pretty quickly and at the end will ask: “Do you wish to delete what is left of /var/tmp/temproot? [no]” – answer “no” here or just hit ENTER.
5.10. To install the new world I do: cd /usr/src and make installworld. Don’t use -j option here.
5.11. I run mergemaster again (without -p this time) to update the files in /etc, the working directory again doesn’t matter. It will first ask whether to use the existing /var/tmp/temproot – just hit ENTER here. Then it will find differences in /etc/motd – choose “i” to install the temporary ./etc/motd. Finally, it will ask: “Do you wish to delete what is left of /var/tmp/temproot? [no]” – answer “yes” here.
5.12. Now I finally reboot and select normal boot. I can safely delete the /usr/obj directory to gain some space (currently about 340 MB). If it was a real working server, I’d probably leave /usr/src intact, but since this installation is just a playground and I’m not planning to do any patches to the sources in the future, I’ll delete it, too, with rm -rf /usr/src/* in order to keep the src itself. The only thing I’d save from there is my custom kernel configuration file – /usr/src/sys/i386/conf/MYKERNEL.
6. Obtaining & installing the Ports Collection meta files.
When I installed this system I followed a minimalistic approach and, when sysinstall asked if I would like to install the Ports Collection, I said “no”. There are several ways to retrieve and deploy the ports collection meta files: CVSup, Portsnap, Sysinstall. All of them are documented in the FreeBSD Handbook. Like when retrieving the base system sources, I’m going to use csup(1), which is a rewrite of the CVSup software in C and is included in the minimal installation so I don’t have to install it separately. Moreover, most HOWTO’s out there already describe the Portsnap method and I want to be consistent with the way I got the system sources.
6.1. In /usr/share/examples/cvsup/ there is a configuration file template called ports-supfile. I edit it and change *default host=CHANGE_THIS.FreeBSD.org to *default host=cvsup7.de.FreeBSD.org.
6.2. Just like in 4.4., I do the SSH port forwarding with the command ssh -f myusername@my.home.machine -L 5999:cvsup7.de.FreeBSD.org:5999 -N and get the error: “socket: Protocol not supported”. A quick search takes me to Bug 408 – sshd[25790]: error: socket: Protocol not supported, which explains that the error can safely be ignored and is caused because I don’t have IPv6 on my hosts. In fact, my.home.machine does have IPv6, but the installation I’m doing here doesn’t – remember I disabled it during installation in 3.13. and later when configuring and rebuilding the new kernel in 5.5. So if I want to avoid the error I should replace my.home.machine with its IP address. Again, if you have direct Internet connection, you don’t need this SSH tunneling.
Finally, I get to the command which retrieves the ports: csup -h localhost /usr/share/examples/cvsup/ports-supfile and about 30 min. later it’s done. The Ports Collection is retrieved and put in /usr/ports. That folder is 394M.
6.3. Now that I have access to all those thousands of applications I need a proof of concept. Let me demonstrate how ports are built from source and installed, and test if that is at all possible. The very first thing I want is to, finally, get Bash, because I’m not used to the default FreeBSD C shell. The commands follow:
cd /usr/ports/shells/bash
make config-recursive
make install clean
I can’t advise what’s best to answer to config-recursive – just use common sense or search the Internet for help about the specific port you’re building. Most of the time, if I’m not sure I go with the defaults.
Well, Bash is quite some port so it takes about 5 min. to fetch, build and install (for some ports it takes days). It also drags some dependencies in but that’s perfectly OK.
The make config-recursive option is often overlooked. Most documents that describe working with ports only say “go to the port directory and do make install clean“. However, the config target is interactive and for ports that depend on many other ports it is likely that I’ll be asked a lot of questions at different stages of the whole process. make config-recursive asks all the questions for this port and all its dependencies in advance so I can trigger the installation of a large port and go to bed, having it done in the morning. See PORTS(7)#TARGETS for more information about all the targets and their sequence.
To make Bash root’s default shell:
chsh -s bash root
7. Enabling Linux binary compatibility & installing Fedora 8 base libraries.
When I installed this system I followed a minimalistic approach and, when sysinstall asked if I want Linux binary compatibility, I said “no”. Now it’s time to get it.
7.1. Add linux_enable="YES" in /etc/rc.conf and either reboot or issue kldload linux.
7.2. Add OVERRIDE_LINUX_BASE_PORT=f8 in /etc/make.conf.
7.3. Add compat.linux.osrelease=2.6.16 in /etc/sysctl.conf and either reboot or issue sysctl compat.linux.osrelease=2.6.16.
7.4. Add none /usr/compat/linux/proc linprocfs rw 0 0 in /etc/fstab.
7.5. Run mkdir -p /usr/compat/linux/proc and either reboot or issue mount /usr/compat/linux/proc.
7.6. Get the linux libraries:
cd /usr/ports/emulators/linux_base-f8/
make config-recursive
make install clean
See Setting up Linux compatibility on FreeBSD 6 for more in-depth explanation on this subject.
8. Installing & configuring Xorg.
8.1. Add X_WINDOW_SYSTEM=xorg in /etc/make.conf.
8.2. Install it from port:
cd /usr/ports/x11/xorg
make config-recursive
make install clean
During
make config-recursive, in “Options for xorg-drivers 7.4” I deselect everyting and leave only: “MOUSE Install mouse input driver”, “KEYBOARD Install keyboard input driver” and “VMWARE Install vmware video driver”.In “Options for xorg-server 1.5.3_7,1”, leave “HAL Compile with HAL config support”. Without it, mouse and keyboard won’t work in X and the VM won’t power off by itself, but will require me to power it off from the VMware menu.
8.3. Add 127.0.0.1 freebsd71 freebsd71.localdomain in /etc/hosts. Without this, startx will lag upon startup and shutdown. I wonder why this is not set by default. On a second thought, this lagging may be because I disabled IPV6 during installation in 3.13. and later when configuring and rebuilding the new kernel in 5.5.
8.4. Download this file: xorg.conf and put it in /etc/X11.
8.5. Add hald_enable="YES" in /etc/rc.conf.
8.6. Issue startx. The X should start with resolution 1152×864 and the mouse & keyboard should work. I can easily change the resolution by changing the line Modes "1152x864" to whatever I like.
There are two very important configuration options in order to have the keyboard and the mouse working. I should either have a)
hald_enable="YES"in/etc/rc.conf, or b)Option "AllowEmptyInput" "off"in/etc/X11/xorg.conf, otherwise the input devices don’t work. It took me about 5 days to figure this out. b) is only needed if a) is not present (or if HAL is not compiled/installed); if I have a) then b) is not needed. Anyway, if I don’t have any of them, keyboard and mouse will not work, even if I install VMware Tools – I tried that.
It looks like VMware Tools are not necessary. X works fine without them because I enabled “vmware video driver” when building it. The other benefits of VMware Tools can also be ignored, see http://ivoras.sharanet.org/freebsd/vmware.html, section “5. VMWare Tools not necessary” for more info.
9. Installing kde4 & making it start upon boot.
9.1. Install it from port:
cd /usr/ports/x11/kde4/
make config-recursive
make install clean
Again, I can’t advise what’s best to answer to
config-recursive, but anyway, in “Options for kde4 4.2.1” I dare to deselect some applications that look like I won’t be using, such as kdeaccessibility, games and so on.In “Options for kdebase-runtime 4.2.1”, there was “PULSEAUDIO Enable playback via PulseAudio soundserver” which was disabled by default. I don’t know why but I felt like enabling it.
In “Options for ghostscript8 8.63” I enabled “Set A4 (not Letter) as a default paper size”.
Oh, duh! As I write this HOWTO, I repeat the steps one by one to make sure that everything I write is the way it is. Yesterday evening I left kde4 to build on VMware at work and it went on its own for a couple of hours, then I went home thinking it would be ready in the morning. This morning I find it waiting on my response to pulseaudio 0.9.14 config target.
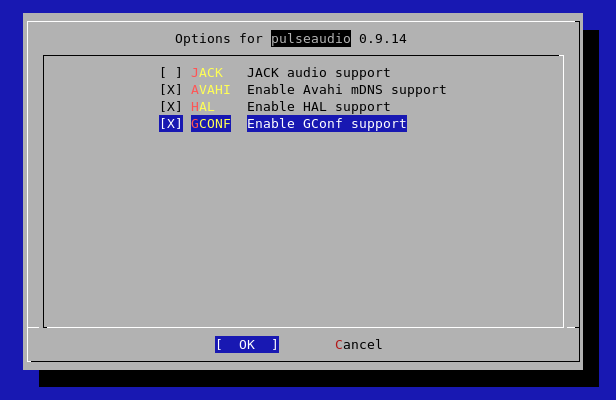
Apparently, make config-recursive does its best in configuring all the dependencies, but it could not foresee that I would select pulseaudio at the kdebase-runtime config target. Anyway, I leave the defaults and the build resumes. I am also presented with the interactive config questions of libsndfile 1.0.19 where I again go with the defaults.
Oops, somewhere along the way I ran out of disk space! :( I think it was after kde4 was built but before it was installed. I went to /usr/ports and issued make clean followed by make distclean just in case and I don’t know why, but it did free some space. I then restarted building kde4 with make build which completed immediately. Then make install took a lot longer, not only installing the port but also building more and more stuff along the way.
Kde4 finally built and installed. Let me delete the dist files rm -rf /usr/ports/distfiles/* to free some space.
To test if kde will start, in file ~/.xinitrc add the following lines (create the file if missing):
PATH=/usr/local/kde4/bin:$PATH
export PATH
exec startkde
and then issue startx from within VMware, not from the SSH session.
9.2. In order to login with graphical authentication form, in file /etc/ttys change
ttyv8 "/usr/local/bin/xdm -nodaemon" xterm off secure
with
ttyv8 "/usr/local/kde4/bin/kdm -nodaemon" xterm on secure
and reboot to test if it works.
9.3. Finally, I quickly install urwfonts: cd /usr/ports/x11-fonts/urwfonts and make install clean. They are not required for X or KDE4 to work, but the more fonts, the better. Moreover, before installing them the KDM login dialog looked like this:
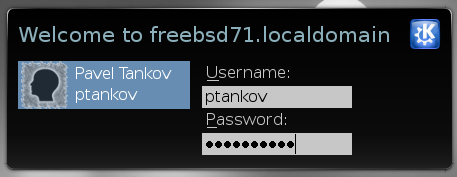
and now it looks like this:
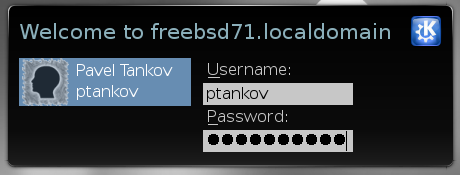
Looking at how the password dots have become thicker and smoother, I can only imagine what other goodies these urwfonts will bring me. ;-) I don’t have to add anything in my /etc/X11/xorg.conf because it already has the entry FontPath "/usr/local/lib/X11/fonts/URW/".
10. Adding a regular user.
Now I am at the KDM login screen, but it won’t allow me to login with the root user, so I need to add a regular user. If I press Ctrl+Alt+F1 I’ll most likely switch to virtual console 1 on my Linux host. To switch to virtual console 1 in the guest OS I need to perform the following keyboard kombination: press & hold Ctrl+Alt, press & release Space while still holding Ctrl+Alt and finally press F1. In short, the key combination is the same with only a hit of the space bar just before F1. Of course, I can always SSH to the guest, but I wanted to demonstrate this nice feature VMware added receintly.
10.1. Once at the console, I add a user with the command (surprise!) adduser. It is interactive and I just answer what it asks, making sure I choose Bash as my shell. Most other questions have reasonable defaults.
10.2. Now go back to virtual console 9 where I left KDM login screen waiting for me (press & hold Ctrl+Alt, press & release Space while still holding Ctrl+Alt and finally press F9) and login with the newly created user.
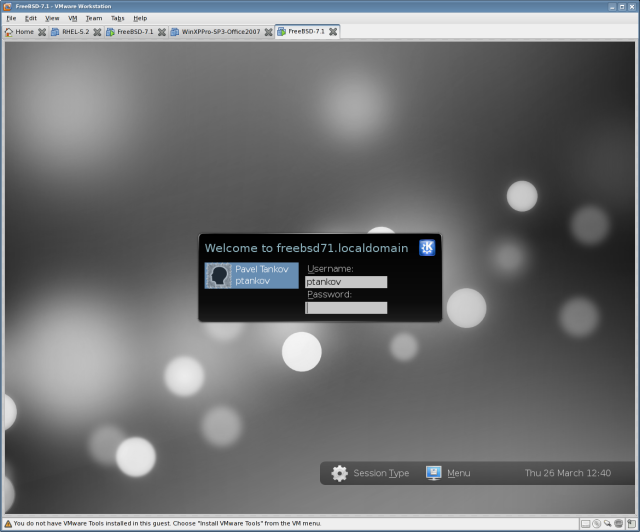
10.3. KDE4 may take a little bit longer to start for the first time and, in the beginning, may look like it’s hung but be patient, it will start eventually.
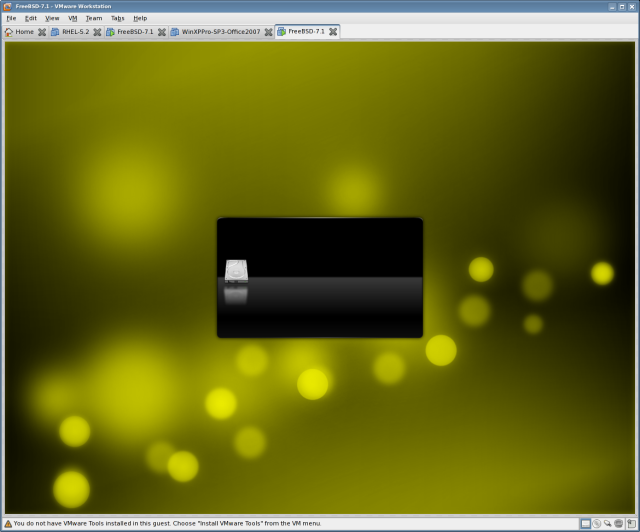
10.4. Also, after the desktop is shown, some programs will launch themselves and pop up some windows for a while so I don’t rush into it immediately, but let those programs do their job without interference.
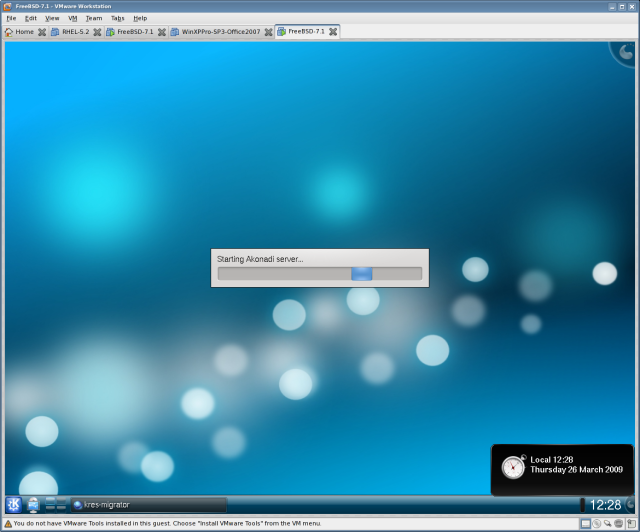
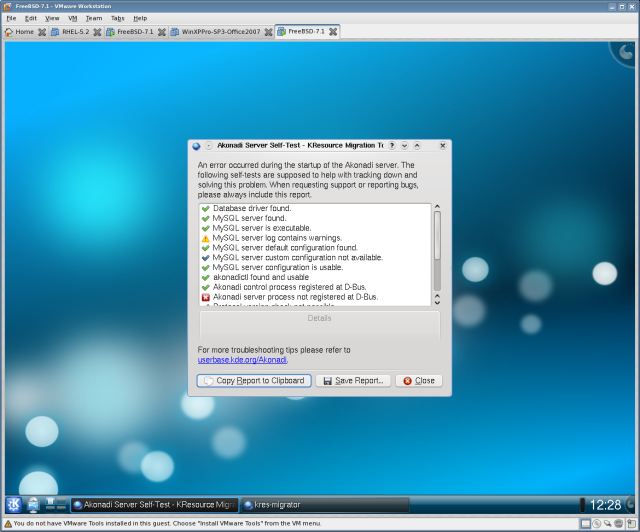
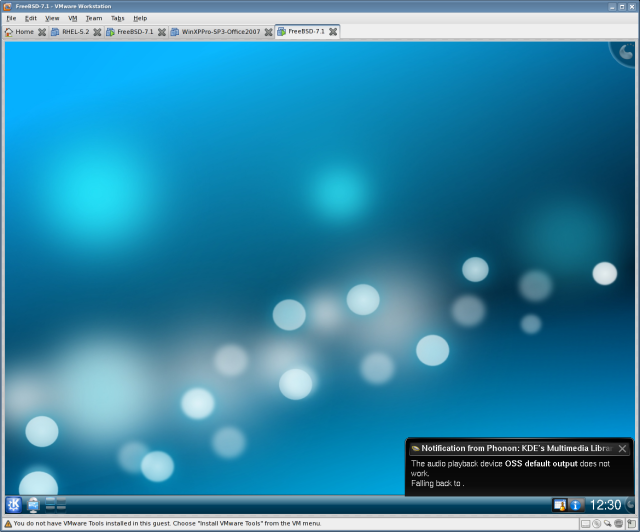
A minute or two later, after all the bells and whistles have settled down and the hard disk indicator in the VMware status bar has stopped reporting crazy disk activity, I can dive into tweaking KDE4 to match my preference. I don’t hear any welcoming music because sound hasn’t been configured and enabled yet.
11. Enabling sound.
Of course, firstly there should be no sound problems with VMware and the host OS. In case of any – search the web, google returns plenty of results.
This one is easy. Just add snd_es137x_load="YES" in /boot/loader.conf and either reboot or issue kldload snd_es137x. Next time I login to KDE4 I am greeted with a welcome sound.
12. Installing Java.
12.1. Config and build the port.
cd /usr/ports/java/jdk16
make config-recursive
That pops up a configuration dialog for jdk 1.6.0.3p4_10 and several more dependencies and I select all defaults.
make build
The build complains that some files with special licenses are missing. I read the error message carefully, because it says from where to get them. Finally, the following files should be in /usr/ports/distfiles:
bsd-jdk16-patches-4.tar.bz2
jdk-6u3-fcs-bin-b05-jrl-24_sep_2007.jar
jdk-6u3-fcs-mozilla_headers-b05-unix-24_sep_2007.jar
jdk-6u3-fcs-src-b05-jrl-24_sep_2007.jar
tzupdater-1_3_12-2009a.zip
Now I re-run make build.
Somewhere during the build process there’s another error:
===> Returning to build of jdk-1.6.0.3p4_10
===> jdk-1.6.0.3p4_10 depends on file: /usr/local/include/cups/cups.h – found
===> jdk-1.6.0.3p4_10 depends on file: /usr/local/diablo-jdk1.6.0/bin/javac – not found
===> Verifying install for /usr/local/diablo-jdk1.6.0/bin/javac in /usr/ports/java/diablo-jdk16
===> Vulnerability check disabled, database not found
===> Found saved configuration for diablo-jdk-1.6.0.07.02_4Because of licensing restrictions, you must fetch the distribution
manually.Please access
with a web browser and “Accept” the End User License Agreement for
“Caffe Diablo 1.6.0”.Please place the downloaded file(s) in /usr/ports/distfiles.
*** Error code 1
Stop in /usr/ports/java/diablo-jdk16.
*** Error code 1Stop in /usr/ports/java/diablo-jdk16.
*** Error code 1Stop in /usr/ports/java/jdk16.
*** Error code 1Stop in /usr/ports/java/jdk16.
Looks like one more file will have to be fetched manually and put in /usr/ports/distfiles. I open the given web address, accept the license and download the file diablo-caffe-freebsd7-i386-1.6.0_07-b02.tar.bz2.
I re-run make build yet again and a few hours later it’s done. Installation is easy with make install, then a little housekeeping with make clean and make distclean.
12.2. I finally test the newly installed java with java -version. To my surprise I get the following output:
java version “1.6.0_07”
Diablo Java(TM) SE Runtime Environment (build 1.6.0_07-b02)
Diablo Java HotSpot(TM) Client VM (build 10.0-b23, mixed mode, sharing)
Hum, Diablo Java… I remember it was dragged in as a dependency while building jdk16. Let me see how many Javas I have installed: pkg_info | grep jdk
diablo-jdk-1.6.0.07.02_4 Java Development Kit 1.6.0_07.02
jdk-1.6.0.3p4_10 Java Development Kit 1.6.0
Looks like diablo-jdk is somewhere in the PATH before jdk-1.6. Let’s see: /usr/local/jdk1.6.0/bin/java -version
java version “1.6.0_03-p4”
Java(TM) SE Runtime Environment (build 1.6.0_03-p4-root_30_mar_2009_17_29-b00)
Java HotSpot(TM) Client VM (build 1.6.0_03-p4-root_30_mar_2009_17_29-b00, mixed mode)
That’s the Java I wanted. I will uninstall Diablo Java: cd /usr/ports/java/diablo-jdk16 and make deinstall. Now let me check again java -version
java version “1.6.0_03-p4”
Java(TM) SE Runtime Environment (build 1.6.0_03-p4-root_30_mar_2009_17_29-b00)
Java HotSpot(TM) Client VM (build 1.6.0_03-p4-root_30_mar_2009_17_29-b00, mixed mode)
Now it’s all done.
13. Installing flash player.
(to be continued…)
[HOWTO] Mount ISO Image File on AIX
The usual mount -o ro,loop image.iso /mnt/iso/, which you’re used to on Linux, can’t be used on AIX. On AIX you dd the ISO file into a raw Logical Volume, then mount the LV as a filesystem. Here are the steps for copying the ISO named image.iso into the folder /mnt/iso/ (a JFS filesystem):
1. Create a filesystem with size slightly bigger than the size of the ISO image. Do NOT mount the filesystem yet. Here I assume we’re dealing with a DVD ISO image ~ 4.7G:
# crfs -v jfs -g rootvg -a size=5000M -m/mnt/iso -Ano -pro -tno
Based on the parameters chosen, the new /mnt/iso JFS file system
is limited to a maximum size of 134217728 (512 byte blocks)

New File System size is 10354688
2. Get the logical volume name associated with the new filesystem:
# lsfs | grep iso
/dev/lv01 -- /mnt/iso jfs 10354688 ro no no
(we see that the logical volume name is lv01)
3. dd the ISO image into rlv01 (raw lv01):
# dd if=/path/to/image.iso of=/dev/rlv01 bs=100M
43+1 records in.
43+1 records out.
(Note the r before lv01! This is important)
4. Mount the file system:
# mount -v cdrfs /mnt/iso
(Note the filesystem type! Unlike the crfs command above, where we used -v jfs, now we use -v cdrfs)
5. Do whatever you do with the files in /mnt/iso.
6. When finished, unmount the filesystem:
# umount /mnt/iso
7. And finally, remove the filesystem:
# rmfs /mnt/iso
rmlv: Logical volume lv01 is removed.
Notes:
*) The above was tested on AIX 5.3
*) For instructions how to do it on Solaris 10 see here: http://geekdom.wesmo.com/2007/03/29/mounting-an-iso-image-on-solaris/
[TIP] View or Extract RPM Packages Content
Case:
You have an RPM package file, for example file.rpm. You want to view what files it contains, and then extract them just as if it was a .tar.gz archive. By the way, it’s a pity Konqueror doesn’t provide a reasonable context menu when you rightclick on it, but only offers to compress (like any regular file) or open it with Software Installer. (I’m talking about KDE, don’t know about Gnome Nautilus). Moreover, if you choose to open it with ark, it doesn’t recognise the format. Of course, the easiest way would be to launch Midnight Commander, “enter” this file as if it was a regular folder and copy whatever you need, but we are looking for a non-interactive and more straightforward method here.
Incantation:
rpm2cpio file.rpm | cpio -t
rpm2cpio file.rpm | cpio -i
Notes:
*) rpm2cpio converts the .rpm file specified as a single argument to a cpio archive on standard out;
*) The -t switch of cpio prints a table of contents of the input, and the -i does the extraction;
*) I tested this on Fedora;
*) The command rpm2cpio is a part of the rpm package on Fedora. You should see how to obtain it for your distro;
*) The command cpio is a separate package on Fedora. You should see how to obtain it for your distro;
[HOWTO] Grant and Revoke Remote root Access to MySQL
To grant root access from all hosts (except for localhost):
GRANT ALL PRIVILEGES ON *.* TO root@"%" IDENTIFIED BY 'topsecret';
To revoke root access from all hosts (except for localhost):
DELETE FROM mysql.user WHERE User = 'root' AND Host = '%';
FLUSH PRIVILEGES;
To enable MySQL service to accept connections from all hosts change the following line in file mysql.conf:
bind-address=127.0.0.1
to
bind-address=0.0.0.0
or better just comment out:
#bind-address=127.0.0.1
and restart the MySQL service.
Notes:
*) The percent symbol ("%") in the notation root@"%" means “any host”, but it doesn’t imply localhost. You need to repeat the commands above with root@localhost in order to grant/revoke permissions for localhost.
[TIP] Mount a Windows share on Linux
To test if your Linux machine sees the shares on the Windows box:
smbclient -L windowsbox -U username
and it prompts you for the password.
Mount the share:
mount -t smbfs -o username=john //winbox/share /mnt
and it prompts you for the password.
Notes:
1) It’s OK to use domain users in both cases ("domainusername"). You need to use quotes to escape the backslash.
2) You can give the password in the commandline options list like this:
-o username="domainusername",password=topsecret
Note that this syntax saves the password. Also, it will be visible in the processes list.
3) The -t smbfs option can usually be omitted. The mount command should detect the type automatically.
[TIP] Mount ISO Image File on Linux
Once you’ve downloaded an ISO image file, you can mount it as a loopback device. This will give you access to the files in the ISO without having to burn it to a CDROM first.
mount -o ro,loop image.iso /mnt/iso/
[HOWTO] Import a Directory Tree in CVS
Case:
Let the directory tree you want to put under CVS control resides in /tmp/working, and you want it to appear in the repository as ${CVSROOT}/tools/mysources.
Incantation:
cd /tmp/working
cvs import -m "Imported sources" tools/mysources vendor start
Notes:
*) Unless you supply a log message with the -m flag, CVS starts an editor and prompts for a message;
*) The string vendor is a vendor tag, and start is a release tag. They may fill no purpose in this context, but since CVS requires them they must be present;
*) working does not need to be under your local CVS directory structure at all. It can be anywhere on your hard disk. The only thing that matters is the CVSROOT- related path you specify to be used by the import command (tools/mysources, in this case);
*) cvs import does not change the directory in which you invoke it. In particular, it does not set up that directory as a cvs working directory. If you want to work with the sources, import them first and then check them out into a different directory;
*) The synopsis of the command is: import [-options] repository vendortag releasetag... This command imports everything under the current working directory. I didn’t find a way to specify particluar items to import;
*) If the mysources directory in the CVSROOT does not exist, it will be created and everything under /tmp/working/* will be added there. If mysources exists, everything under /tmp/working/* will be added there, preserving the original content that was there before;
See: this reference from ximbiot.com for more info on the topic.
[TIP] delete a line in-place with GNU sed
Case:
Suppose you have a file named testfile with the following content:
one
two
three
Say, you want to delete those lines that start with the string tw (that is two in our example). Here is the GNU sed command to use:
Incantation:
sed -i -e "/^tw.*$/d" testfile
Result:
now testfile has this content:
one
three
Notes:
*) -i stands for “in-place”, i.e. perform the command directly in the file (GNU sed only);
*) The caret (^) matches the beginning of the line;
*) A period (.) matches any single character;
*) The asterisk (*) matches zero or more occurrences of the previous character;
*) The dollar sign ($) matches the end of the line;
*) d is the delete command;
